Showing posts with label saving money. Show all posts

Saturday, May 14, 2011

I love consignment stores

I have told y'all of about my habit of shopping at consignment stores before. But let me use this post to profess my love of consignment stores.

The Good Daughter is lucky in that her birthday is six months from Christmas. So clothes she gets at Christmas last roughly until her birthday where she then gets clothes to last her through to Christmas. It's a pretty sweet deal.

However, there are times when I need to buy something for her that she just didn't have and wasn't available at stores until now.

Like an Easter dress.
This one actually doubled as an Easter/wedding dress since we suddenly have to go to 3 wedding in two months when it has been 7 years since the last wedding we attended.

I just died when I saw this. There was not a drop of stain on it and the cherry blossoms are just so damn cute I am sad TGD will outgrow this soon. I seriously want to frame it or some shit. But the best thing is, this cute Old Navy number was only $5. Yup. Cheaper than a pack of smokes. The hat was separate.

Another item you can't find in the dead of winter in the Midwest is swimsuits. TGD needs two suits for daycare, so I checked out the consignment store, hoping they would have some in TGD's size. I was lucky they had several option but once I ruled out all the bikini style suits, there were 5 suits to choose from. I let TGD pick and she chose:

This freaking cute number. It is a two piece and the bottom is cut like traditional undies, but the top covers her belly and arms, which is good considering I need to be more diligent about applying sun screen in the summer.

We had a day in the high 80s this week, so I busted out the hose, slapped the suit on her and headed out in the yard. She didn't like the hose, and I don't blame her since the water was cold as hell, but she loved the suit. I even let her play in the tub with it.

And this little Gymboree beauty was only $4. A quick google tells me this thing is selling on ebay for 25 bucks.

So I hope this post debunks any notion that consignment stores only sell old, outdated stuff you wouldn't put on your dog. Consignment stores fucking rock.

Wednesday, January 27, 2010

Homemade Baby Food

I sound like a broken record when I recount how cheap The Good Husband is, but it is true. I am lucky he doesn't turn 2 ply toilet paper into 1 ply to save money. I would divorce him then.

So along with cloth diapering, breastfeeding and getting most of The Good Baby's clothes from yard sales, we decided to make most of TGB's food.

The first thing I did was buy Top 100 Baby Purees: 100 Quick and Easy Meals for a Healthy and Happy Baby by Annabel Karmel. I really like this book. It has all the recipes broken down by age. There are some funny recipes in there for dinners like "My First Fish Puree" and "Pasta with Butternut Squash, Tomato and Cheese". Not meals you generally think of for babies, but I like the author's idea that babies don't have to eat bland foods.

In fact, we are tying to expose TGB to a wide range of foods.

We are tying to limit TGB's exposure to chemicals in every way possible. The biggest factor being what she consumes. So we are trying to buy as much of her food organic if possible.

It isn't easy. There are a lot of foods I just can't find organic. When was the last time you saw an organic parsnip? So without the aid of the Farmer's Market and using The Dirty Dozen and Clean 15, as a guide, I have decided to make all of TGB's food at home and for super cheap.

Here is just a sample of what I have made so far:

The Veggies

From left to right: back row -Sweet Potato, Corn, Carrot, Cauliflower. front row - Green Beans, Parsnip, Broccoli

The Fruits
From left to right: Pear, Peach, Apple, Blackberry
Not pictured: Zucchini, Apricot, Rutabaga, Spinach, Butternut Squash
(This picture strikes me as some work of modern art. It has to be the lighting.)

Making your own baby food has several benefits.

First, I can control the quality. As I mentioned, we tried to get all organic produce.

Secondly, it is cheaper.

Consider, I can buy one jar of organic baby food on sale for $1. Right now, that is two servings for TGB. For $2, I can buy a bag of frozen corn on sale and that will produce about 2 ice cube trays of corn puree, or 14 2 once servings. So it costs $0.14 for one serving of homemade baby food, versus $0.50 for organic jarred.

That alone should be reason enough to make your own.

But making your own baby food also produces less waste, since you don't have to have multiple single use jars lying around. You could make cute Halloween decor with them, but still, most people just recycle them.

Making your own baby food is also super easy. Basically all you have to do is steam and puree all the foods and freeze. Fruits like peaches and blackberries, you can just puree directly from the frozen and then refreeze. I use ice cube trays to freeze them and each cube is about one once.

You can also experiment with several foods. I noticed that veggies like broccoli, cauliflower and zucchini didn't seem to be popular baby foods. Either was parsnips or rutabagas. But now I can make my own and TGB can eat a wider range of foods.

She loves peas and carrots and all the root veggies, so far, so I am a happy Good Wife.

So for anyone looking to either save money or control the quality of food your baby consumes, I would recommend making your own baby food.

Monday, October 12, 2009

Go Green - Cloth Diaper

It was The Good Husband's idea to cloth diaper (CD). It was one of those ideas he floated around before we had kids that I kinda just brushed off - like naming one of our kids Atticus.

Then I got pregnant and TGH got super cheap and started to research CD options. I soon took over the research and after a few days of intensive searching we came up our plan of attack.

The first and most overwhelming part of cloth diapering is distinguishing the different types of cloth diapers out there. There are several different kinds and styles. They range in price from the super cheap to the really expensive. We attended a cloth diaper class at a local store (Pinstripes and Polkadots) and were able to see the different styles and types of diapers and learn about cleaning them.

Then there is the Poo Factor.

At first it is a little gross to think about all that poo in your washing machine. However, breastfed babies have poo that is completely water soluble. It will rinse completely away. Secondly, everyone I know that uses disposable diapers will have blowouts, where the poo will explode from the diaper and cover a baby head to toe. All that poo gets on the baby's clothes and where do the clothes get washed? You guessed it - your washing machine. So if you have a baby, you will have poo in your washing machine at some point in time.

We did a combination of pre-fold diapers with covers and a one-size pocket diaper. This is the best mix of cheap and expensive diapers. What does that mean?

Pre-fold - This is what you think of when you think of CDs like your grandma used. They are called pre-folds, even though they are one big square, because in the dark ages of CDs this little diaper was actually 3 times bigger and had to be folded so all the absorbency was in the center.

Today's pre-folds are made to already have that absorbency in the middle so you don't have to fold it down to size. These work with a diaper cover. You will need to learn how to fold them however, to fit your baby and to fit inside a diaper cover. You will also need either diaper pins or Snappies to hold these closed.

Fitteds - These are similar to pre-folds but you don't need to fold and secure them with a pin or a Snappie. They come with snaps so it is super easy and fast to use. This is the best kind of diaper to use in the middle of the night, when you are tired and it is dark and you just want to change a diaper in world record speed to get back to sleep. Think of a cloth diaper in the shape of a disposable with snaps. These will need a cover too.

Covers - These replaced the plastic pants of yore. They have a cloth outside but most are PLU - polyester with urethane coating - on the inside to repel water and poo.

Pocket - This kind of diaper is getting close to a disposable in shape and ease but there is still some work involved. A pocket diaper has the inner cloth diaper and the cover swen together to create one diaper you just put on and secure with the hook and loop tabs (or snaps). You do have to stuff these diapers with a liner that looks like a panty liner but without the adhesive. This diaper is good if you have a heavy wetter, since you can control the absorbency. You do have to be careful when you wash these but I will address that below.

One-size - This is the easiest diaper to use in terms of sizing for your baby. If you don't want to have 5 different sizes of diapers, a one-size diaper will allow you to use the same diaper over and over again, adjusting for size as your baby grows. These diapers feature snaps that will rise with the baby so you never need to worry about having the right size of diaper again. All of these diapers are pocket diapers or all-in-ones - meaning they have the cloth diaper and the cover swen together.

Here is our stash as it looks today:

From bottom left to bottom right: covers, Snappies, cloth wipes, inserts, pre-folds, pocket diapers (the colored ones) and fitted diapers (the tan ones)

Here is what it looked like the first day we got them:

What is in our stash? (We wanted to wash our diapers every other day to every third day.)

~36 pre-fold diapers in Standard Infant (not pictured)
~5 fitted diapers in size 0 (not pictured)
~5 diaper covers in size XS
~15 one-size pocket diapers
~36 cloth wipes
~3 stay dry liners (for the pocket diapers)
~3 diaper doublers (for the pocket diapers)
~3 Snappies
~3 diaper pins
~1 wetbag
~1 pail liner
~2 pair of Baby Legs - b/c they are so damn cute

Prepping and Washing
Pre-fold diapers are not ready to use once you get them. You have to wash them several times in order to get the natural oils off the fibers and to make them absorbent. Notice the difference between the diapers from when I first got them (below) to what they look like now (first photo)?

They got nice and soft by washing them 7-8 times in hot water with just a drop of detergent and then drying.


You have to also pay extra attention to how you wash your CDs when they are soiled. Sadly, you don't want to use homemade laundry soap on them.

To wash the pre-folds, I just toss the diaper and the cloth wipe into the diaper pail and after a few days, empty the bag into the washing machine. I throw the pail liner in with the diapers and covers (although you don't need to wash the covers every time you use them. Unless the cover got poo on it, I usually can use it for a few times and then wash).

I do one cold rise, add a drop (seriously, like 1/8 of a cup) of detergent and wash on hot. I dry them normally.

Washing the pocket diapers are a little more labor intensive but not by much. When you are changing your baby you have to remove the liner and toss that into the diaper pail along with the wipe and diaper. You wash and dry your diapers in the same way as your pre-folds, only taking the time to stuff the pocket back into the diaper as you are folding them and putting them away.

With pocket diapers you have to be very careful you do not do anything to clog the microfiber holes that allow the diaper to absorb liquid. This means using certain types of laundry detergent and NO fabric softeners. I use Arm & Hammer Free and I have had no problems. You can find other CD Safe detergent here: http://www.pinstripesandpolkadots.com/detergentchoices.htm

We have been CDing The Good Baby for almost 4 months now and have not had any problems so far. Our water bills have only increased by less than $10 and we have only had one poo explosion. Overall I am totally happy with CDing. The $1500 I stand to save by CDing TGB and the $2000 I stand to save with each additional baby has been well worth it.

Thursday, July 16, 2009

Go Green - Green Cleaning

The biggest bulk of our green living comes from switching to non-chemical and natural cleaning products. I always believed before that a good cleaning requires chemicals to really clean and I should have bought stock in Comet, for as much as I used.

But after getting pregnant and with The Good Baby here, I wanted to lessen her and my exposure to household chemicals. After all elbow grease is free.

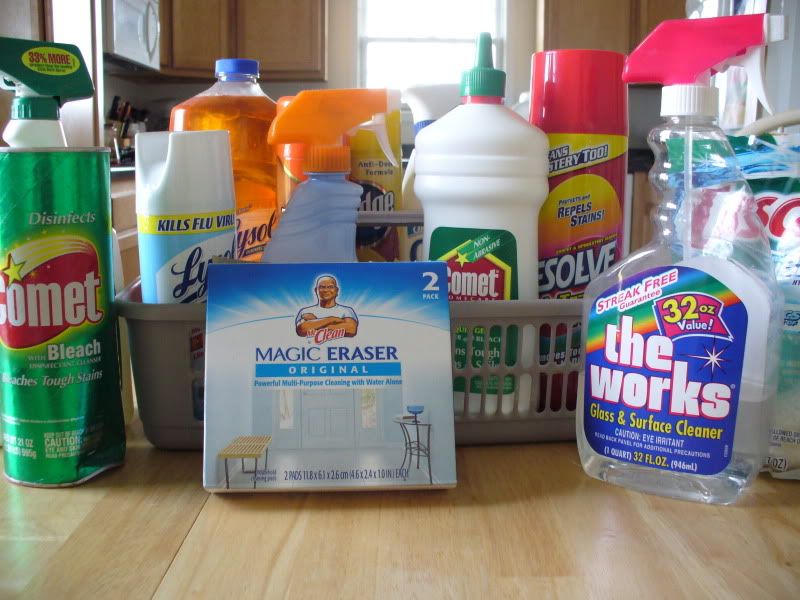
Before my cleaning supplies looked like this:

Now they look like this:
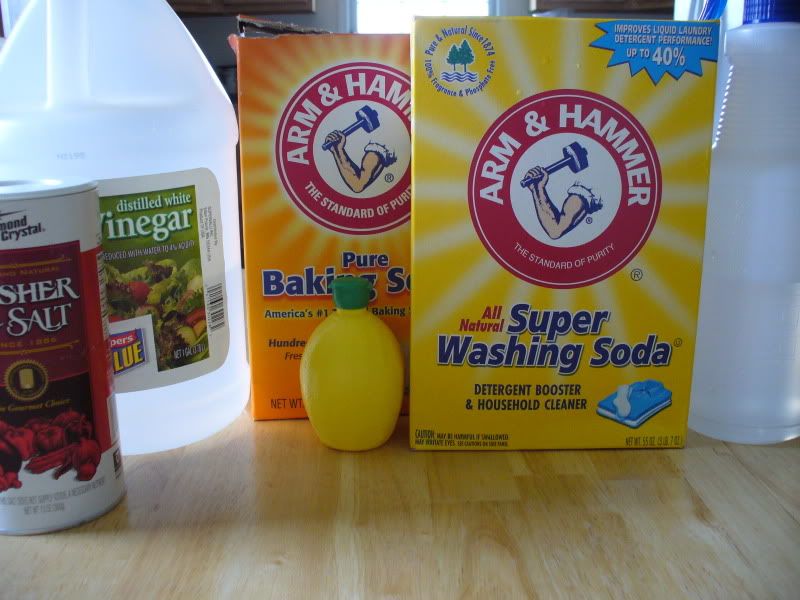
You will find that several ingredients can accomplish what all the previous cleaners did. Baking soda, borax, salt, lemons and vinegar will go a long way in providing for a clean house.

All Purpose Kitchen Cleaner (instead of Comet)
2 tablespoons vinegar
2 cups hot water
1/4 cup liquid soap

~Mix everything but soap in a spray bottle and shake. Add 1/4 cup liquid soap last. Mix gently. Apply and wipe clean. Good for counters, wood work, appliances, etc.

Scouring Powder (instead of Comet)
Baking soda

~Pour in shaker and sprinkle in sink or on pans. Scrub with a pad and rinse.

Scouring Paste (instead of Comet)
2/3 cup baking soda
1/2 cup liquid soap
2 tablespoons vinegar

~Mix soda and soap to form a paste. Add vinegar and stir. Keep paste in a tub at the kitchen sink for scouring pots and pans or the sink itself.

Drain Cleaner
1/2 cup baking soda
1/2 cup vinegar

~Pour baking soda down the drain followed by vinegar. Let it bubble for 15 minutes, then pour down a teakettle full of boiling water.

Garbage Pail Deodorizer
1 teaspoon tea tree oil
1 cup baking soda

~Mix and work out all the lumps with a fork. Sprinkle in bottom of pail after liner is removed. Periodically rinse pail with vinegar and water and let dry.

Oven Cleaner (instead of Off!)
1 tablespoon liquid soap
1/2 cup water
1/4 cup salt
3/4 cup baking soda

~Spray oven surfaces with soapy water. Mix salt and baking soda and sprinkle on wet surface. Spray again so that the mixture is damp and pasty. Let stand overnight. Scrape off with putty knife or wet pumice stone.

Floor Cleaner (instead of Mr. Clean)
1/2 cup vinegar
1 gallon water

~Combine in a bucket or sink and use on vinyl or title floors

Fabric Softener
Vinegar

~Add 1-2 cups of vinegar to rinse cycle to deodorize and soften fabrics.

Tub and Tile Cleaner
1 2/3 cup water
1/4 cup liquid soap
1/4 cup baking soda
2 tablespoons vinegar
A few drops of essential oil (optional)

~Add soap to water and let dissolve. Stir in baking soda, then add vinegar. Store in a squirt bottle and shake before using. Rinse thoroughly to avoid leaving a residue.

To clean grout, mix lemon juice and baking soda and apply to grout. Let dry and then rinse.

Mold and Mildew and Soapscum
Equal parts vinegar and water

~Spray and wipe clean.

Toilet Bowl Cleaner
Tub and Tile Cleaner (see above)
1/4 teaspoon tea tree oil (optional)

~Spray inside of toilet bowl with cleaner. For tough stains, sprinkle baking soda on a wet bowl brush, scour and rinse. Clean bowl thoroughly and often.

TIP: Drain water from the toilet bowl for better cleaning. For serious stains or rust, empty water out of bowl and scrub with a wet pumice stone. When wet, the stone will not scratch porcelain.

To remove hard-water rings: spray undiluted vinegar around the inside of the toilet then sprinkle borax onto the vinegar. Let it soak for about half an hr. Repeat if necessary.

Wood Polish
1/4 cup olive oil
1/4 cup vinegar
10 drops essential oil (optional)

~Mix and apply. Wipe clean.

Glass Cleaner (instead of Windex)
1/8 cup vinegar
1 cup water

~Mix ingredients in a spray bottle. Shake and apply. Wipe clean with newspapers.

Carpet Deodorizer
1 pound box baking soda
1 teaspoon essential oil

~Mix using a fork to work out lumps. Sprinkle on carpet. Vacuum after 1 hour.

Carpet & Upholstery Stain Remover
Equal parts vinegar and water

~Mix and use to remove tough stains including grass, perspiration, rust, jam, coffee, orange juice, wine, beer, ketchup, barbeque sauce, chili, urine and pet stains.

TIP: Never use warm or hot water on stains containing sugar!

Powder Laundry Detergent (not recommended if you cloth diaper)
1 bar of soap (I use Dr. Bronner's Mild Baby)
1 cup borax
1 cup baking soda
1 cup washing soda

~Grate the soap on a cheese grater and combine all three. Use 1 tablespoon for small loads or in high efficiency machines and 2 tablespoons for regular loads.
*Soap tip- Grate it and let it sit for a few days to dry out the soap. Use your fingers to crush the soap to a finer consistency. This will help it dissolve better.

Powder Dishwasher Detergent
1 cup washing soda or baking soda
1 cup borax

~Mix thoroughly and store in a plastic container, use approximately 2 tablespoons per load. Use vinegar in the rinse compartment as a rinse agent to help prevent residue

To deodorize microwave, place a bowl of water with a few slices of lemon or a couple of tablespoons of lemon juice. Cook on high for about a minute. Doing so also makes it easier to clean the interior of the microwave (the steam it creates loosens hardened spills).

To clean the refrigerator: use a sponge moistened with vinegar, it helps prevent mildew. For hardened spills, make a paste of lemon juice and baking soda, scrub and wipe with the cloth moistened with vinegar.

To clean the coffeemaker glass pot: use lemon juice and salt and rub with a sponge or lemon juice and baking soda. Rinse well.

Wednesday, June 24, 2009

Go Green - Finances, dining out and misc

Want to be greener with your money, dining and other areas? Here is a list of things you can do to lessen your impact. These are all things we do in The Good Household, so take that endorsement for what you will.

Finance
~Pay with your debit or credit card

~Buy checks made from recycled paper

~Don’t take a receipt at the ATM or at the gas pump

~Have your bank statements emailed to you

~Pay your bills online

~Shred your past bills and use them in your compost pile or

~Recycle your paper and junk mail

~Sign up to receive less junk mail: https://www.directmail.com/directory/mail_preference/?ref=G

Misc
~Read the newspaper online

~Save information to your computer or a flash drive instead of printing hard copies

~When you do have to print, change the margins and font to use less paper

~Use email instead of regular mail

~Send digital photos to your friends and family

~Recycle ink cartridges at places like Office Max, Office Depot or Staples

~Use http://www.evite.com/ to send invitations to parties and gatherings

~Send virtual cards and greetings

~Bike, carpool or take public transportation to work

~Telecommute to work one day a week

Dining Out
~Bring your own container for leftovers

~Bring your own coffee mug to your local coffee shop

Coming next week: Go Green - Cleaning

Wednesday, June 17, 2009

Go Green - Personal and laundry

This is the list of little things we do in The Good Household to lessen our impact on the earth.

Laundry
~Use a clothesline or air dry your clothes

~Use a dryer ball instead of fabric softener or sheets (dryer sheets contain animal fat, which can leave deposits inside your dryer)

~Wash your clothes in cold water

Personal
~Use baking soda and vinegar to wash your hair

~Use baking soda and water to brush your teeth

~Switch to a crystal deodorant

~Cloth diaper

~Use non disposable razors

~Cut your hair at home. The Good Husband keeps his hair buzzed so this is no problem for me to cut his hair.

~Shop at second hand and consignment shops for used clothing

~Shop garage and yard sales for used goods. I was able to get a ton of almost brand new clothes for The Good Baby by shopping yard sales.

~Switch to environmentally friendly personal products, like the Diva Cup: http://www.divacup.com/

~Buy toilet paper made from recycled paper

~Use a better toothbrush, like the replaceable head Source toothbrush:
http://www.radiustoothbrush.com/index.asp?PageAction=VIEWCATS&Category=16

Coming next week - Go Green - Finances, Dining Out and Misc

Wednesday, June 10, 2009

Go Green - Kitchen

One of the biggest sources for inspiration for green living comes from The Good Grandma and various aunts in the family. Having lived through the Depression and raising several kids on a few dollars a week made TGG and her kids resourceful. They are able to come up with reuses for tons of things and have given me a whole new outlook. They had to look for ways to reduce and reuse out of necessity whereas I am able to do it freely.

The biggest change of mindset I made when going green was stopping to think about everything I was throwing away and if there wasn't an alternative. I think most of the time we forget that things like paper towels are not the only option and there are cheaper and better things out there.

So my number one green tip is to actually stop and think about everything you do and use and see if there is some better alternative out there.

These are some useful tips that The Good Husband and I practice in the kitchen, to save money and become more "green".

~Switch to cloth napkins

~Switch to cloth for paper towels or

~Buy paper towels made from recycled paper

~Use plastic containers for leftovers (BPA Free)

~Always run your dishwasher with a full load

~Shop at your local farmer’s market

~Buy locally raised beef, pork, chicken, lamb and buffalo: http://www.localharvest.org/

~Join a local CSA

~Use cloth grocery and produce bags for shopping

~Recycle all plastic and glass containers

~Recycle your plastic bags at local grocery stores

~Keep a compost container on your counter top for food scraps

~Buy in bulk and separate into individual portions (This works great if you love those 100-Calorie snack packs)

~Wash and reuse plastic resalable bags

~Keep your freezer well stocked. Having lots of open space in your freezer causes it to run more to cool the same amount of space. If you can't fill it full of food, trying freezing milk jugs filled with water. You will save on your cooling costs, and you will always have ice blocks on hand to fill your portable coolers.

Coming next week - Go Green - Personal and laundry

Wednesday, June 3, 2009

Go Green - Inside and out

The Good Husband and I recently bought a house and having our own piece of borrowed Earth, has made us more conscientious of how we treat her.

See, I have always had hippy tendencies but TGH does what he does because he is cheap. When he suggests things that are crunchy, hippy type things, I know he is doing it with the main goal of saving money. This is why he suggested cloth diapering The Good Baby. It wasn't about the environmental concerns, it was about keeping more green in his wallet.

So hippy and cheap make for quite a pair.

I have composed a list of green/cheap things we do and separated them into several different categories. Most of these things save money in the long term but might be a little costly upfront.

This first post is about the things you can do on the outside of your house and with the materials on the inside. TGH and I were lucky enough to build our own house so some of the things, like choosing what building materials and appliances to buy, was easier for us since we were buying everything together. It might be easier for you to slowly replace appliances and materials over time.

Everything on the list is something that we currently do or are preparing to do in the future.

If you have any questions, feel free to email me and I will answer you as best I can, keeping in mind I am no expert, just A Good Wife.

Inside
~ Use green flooring options like carpet with no or low VOC and hardwood floors from sustainably managed forests. More information here: http://www.coopamerica.org/pubs/realmoney/articles/flooring.cfm

~Use low or no VOC paint: http://www.eartheasy.com/live_nontoxic_paints.htm

~Buy Energy Star appliances: http://www.energystar.gov/

~Have blown cellulous insulation installed: http://www.associatedcontent.com/article/1515640/cellulose_insulation_environmentally.html

~Use a programmable thermostat and adjust it during the day. During the day in fall and winter, we keep the thermostat at 65 during the day and turn it down to 60 at night. During the summer, we keep the thermostat at 82 during the day, 78 when we are home and 75 at night.

~Use fans and keep the windows open to delay the use of the air conditioner or furnace.

~Buy thermal curtains to help insulate your house.

~Use a power strip and unplug the strip when you are not using any of the appliances

~Switch to CFL light blubs (DO NOT throw these in the regular garage!)

~Save old batteries, medicines, CFLs, motor oil and look for recycling programs that will accept them. My city has an annual Household Hazardous Waste Collection that accepts all these items and more.

~Check out places like GoodWill, The Salvation Army and http://www.freecycle.com/ for used furniture (slipcovers go a long way)

~Use a low flow shower head

~Place bricks in the back of your toilet tank to use less water

Outside
~Start a garden

~Start a compost pile

~Plant shade trees to help shelter your home from the weather

~Build or buy a rain barrel

~Use a manual lawn mower: http://www.cleanairgardening.com/reelmowers.html

~Use native plants and trees when landscaping

~Use solar powdered lights to light sidewalks and driveways

~Install a sensor to your outside house lights that will turn the lights off automatically when it is daylight.


Coming next week: Go Green - Kitchen

Sunday, May 17, 2009

Homemade Peanut Butter

Why would anyone make homemade peanut butter when you can go to the store and get some peanut butter for about $1.50?


Well, first is quality.

Most of the cheaper peanut butters are loaded with sugar and hydrogenated oil. Even the organic or all natural peanut butters have sugar in them and they are well over $1.50. You get to control what you add and how smooth or crunchy it is.

Second would be cost. The cheapest and most basic peanut butter (think peanuts, salt and oil listed as the only ingredients) I found at my local store is close to $4 for a jar. On the other hand a 16 oz jar of roasted peanuts cost about $2 and yields the same amount of peanut butter as the $4 jar.

Lastly would be the ease which it takes to actually make homemade peanut butter. If you have a food processor, you basically just throw everything in the bowl and turn it on.

In the beginning it will look like the mixture will never become peanut butter, but trust me, it will. One trick is to add the oil to the bowl first so that it comes up over the blades or close to them. Then add the salt and peanuts. Turn it on and just let it go.

I probably processed the peanut butter for close to 3 minutes before I got the consistency I wanted. I normally like super crunchy peanut butter, but with homemade, and even natural, it is a whole different ball game. Even the smoothest of homemade peanut butter is crunchy and that is fine by me.

Ingredients:
2 cups lightly salted dry roasted peanuts
4 tablespoons canola oil
1 teaspoon salt or more to taste

Directions:
~Combine all the in the bowl of a food processor and blend until the desire consistency.

~Store in an airtight container in the fridge.

recipe by: The Good Wife

See? Cheap, easy and fun, just like me. Wait a minute....

Friday, August 22, 2008

The Good Wife Guide . . . to saving money

There are several things that TGH and I are trying to do to save money. One of the areas where we try to save is our grocery bill. There are several things that you can do that are small efforts that produce big results.

~Buy in bulk, especially meat. Look for family packs of meat and separate the meat into smaller, easier to use packages. Also, if you want to go organic, you might be able to find a local farm that will sell you a whole or half cow. Visit http://www.localharvest.org/ to find a farm near you. We are lucky enough to live rurally and have beef, chicken, lamb, pork and buffalo farms near us where we can buy meat. Dollar for dollar, we usually come out a head or break even in terms of saving money on meat.

~Buy in bulk for as many things as you can. Something that will save you money is buying cheese in blocks and then shredding it on your own. Buying blocks of cheese and shredding it can save me up to $3 dollars for shredded cheese. You can freeze the cheese, up to six months, so stock up.

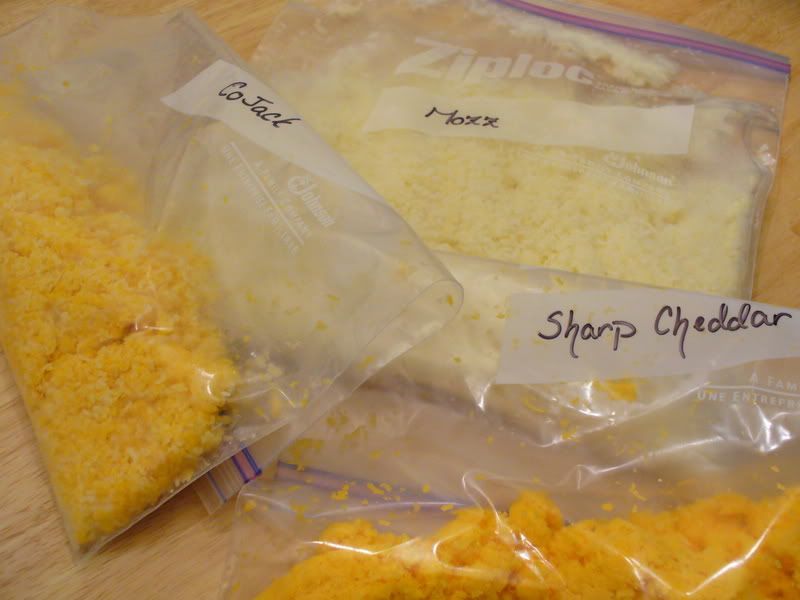
The Good Wife Tip: Make sure the cheese is very very cold, if not partially frozen, before you shred it. I used my Kitchen Aid Stand Mixer with the shredder attachment to shred the cheese. The sharp cheddar became a little clumpy since the shredder had warmed. But I just unclumped it as best I could, stuck it in the freezer for an hour and then unclumped it again.

~Use coupons and look for stores that will double or triple the coupons. There are usually two, sometimes three, stores that I will go to every week. I try and go on Saturday morning since there are less crowds and it is usually the last day for sales. I check the ad to see what is on sale and then I check to see what coupons I have. There are some websites that do this for you (The Coupon Mom and The Grocery Game) so it might be the easiest way to start.

~Always have a grocery list with you when you shop. I like to sort my list by aisle (I have shopped at the same 2 stores long enough that I know what is in what aisle). I sort my list by aisle and then any item I have a coupon for, I star. I paperclip my coupons to the back of my list so I am ready to go when I get to the checkout.

~Meal plan. Using the coupons and the sales flyer, I try to come up with all the meals we will have that week. Most people and some shows (Quick Fix Meals with Robin Miller) suggest that you eat the same kind of protein three different ways during the week but TGH and I would get burn out. So every day of the week we have a different protein: Monday - Beef, Tuesday - Pork, Wednesday - Chicken, Thursday - Pasta, Friday - Veggie/Seafood, Saturday - FREE(we usually eat out this night) and Sunday - Chicken. I find that this way helps to eliminate the feeling of eating the same thing all the time.

~The freezer is your friend. I am too scared to jar and can but freezing your veggies are a good way to save. Buy in bulk when summer produce is cheap and freeze the extras. Some good sites for more tips and hints to what you can freeze and how: http://www.extension.umn.edu/distribution/nutrition/DJ0555.html

http://farmgal.tripod.com/Freezerbasics.html