
Friday, October 31, 2008
Blogging might be slow in the future
Monday, October 27, 2008
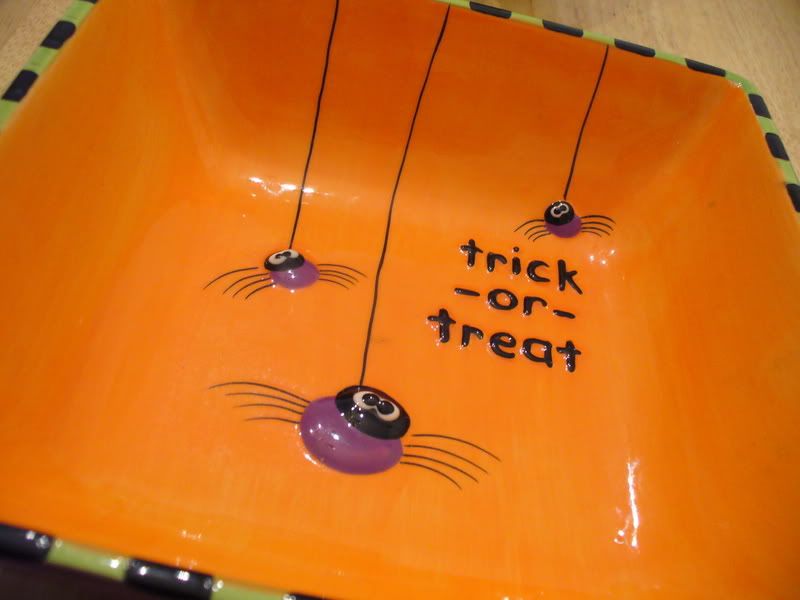
Halloween Decor

Tools and Materials
Clean jars
Oil-based enamel paint in black and orange or yellow
Paintbrush
Extra-wide masking tape
Marker
Utility knife
Plastic-covered 20-gauge wire
Needle-nose pliers
Small candle (such as the LED candle)
Jar-o'-Lanterns How-To:
~In a well-ventilated area, paint inside of jar orange or yellow until opaque. Apply masking tape to outside. Press out air bubbles. Draw a jack-o'-lantern face in marker on tape (or print out our templates onto adhesive labels). Cut out and peel away features with a utility knife to form a stencil (an adult should do this).
~Paint stencil with black paint. When dry, peel off tape.
~For a handle, loop the end of wire with pliers. Make a lasso shape that will hug jar. Bend remaining wire over for a handle. Cut wire; make another loop to hook onto ring. Slip ring over jar's mouth; tighten.
NOTE: For the jars, I used baby food jars. I didn't want to waste all that baby food, so I got foods that I would eat - bananas and pudding. I got several different sizes and I thoroughly washed and dried each one.
Then I used acrylic paint instead or oil based. I used Delta Creamcoat in Pumpkin and Tangerine.
Next, I tried to do the stencil but it was such a pain in the ass, that I decided to free-hand it. I used Delta Creamcoat in black and I painted the faces on by hand.
Also, instead of using plastic wire, I just used silver floral wire from the craft store and painted it black. I did use the pliers to tighten the wire but since I thought the jars were rustic, I didn't worry too much about being perfect.
I made these jars back in 04 and someday I might paint some more to add to the collection. All in all it was about a 4 hour project, considering since you pain the inside of the jars, you can paint the outside while the inside dries. You can also save time by either using black floral wire (if you can find it) or by leaving it sliver. I have never actually put a tea light in the jars, since I think they look fine as is, but you totally can.
I put the pumpkins out this weekend and when The Good Husband came home he noted I had them out. He knows how much pride I have in finishing projects I start so it did mean a lot to me that he commented on them. I think he thinks they are cute too.


Our candy bowls, sans candy since I would eat all of it before Halloween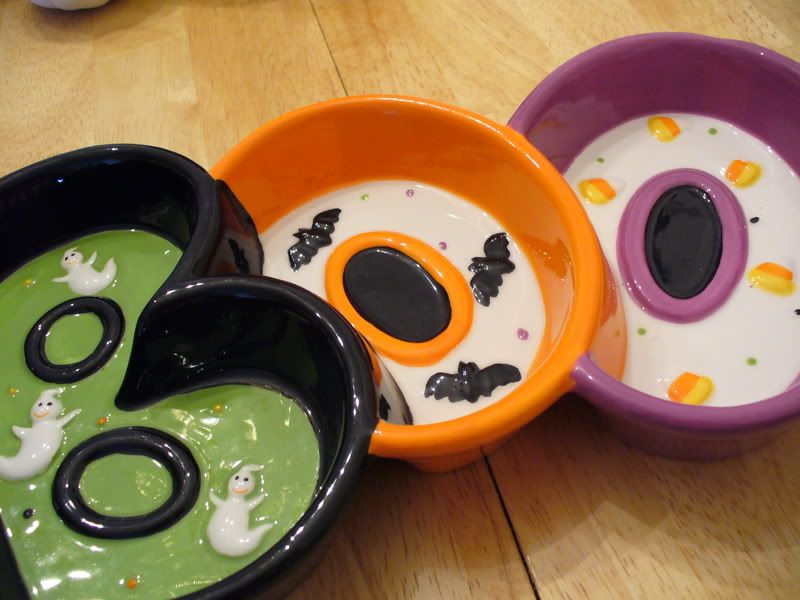

Friday, October 24, 2008
Colleen's Potatoes
How can you not love that? I am actually kinda pissed that I gave The Good Husband the last of the leftovers for lunch today. Oh well.
I get a feeling that this is a dish that goes by several names. When describing the cheesy, buttery goodness to my mom she said, "Duh! That is Texas Potatoes." This from a woman that never cooks. But a quick google sure enough provides for similar recipes.
I don't care what they say. This dish will always be "Colleen's Potatoes" in the Good Household, a tribute to the best aunt ever!
 Ingredients:
1 pkg. frozen Southern style hash brown potatoes, thawed (the little square kind)
2 c. shredded cheddar cheese
1/2 c. chopped onion
1 teaspoon salt
1 teaspoon garlic powder
1 can cream of chicken soup
1 stick butter, melted
1/4 tsp. pepper
2 cups (16 oz.) sour cream
Topping:
1/2 cup melted butter
2 cup crushed cornflakes
Directions:
~Preheat the oven to 350 degrees.
~Combine the first nine ingredients. Mix thoroughly to combine. Pour into buttered 9x13 baking dish.
~Combine cornflakes and melted butter and top casserole. (I like to crush the cornflakes in a plastic bag using a rolling pin).
~Cover and bake for 45 minutes. Remove foil and bake for another 15 minutes until the topping has browned and the center is heated through.
Thursday, October 23, 2008
Ingredient of the Week . . . Cheddar Cheese
First up is a dish that made it's debut in the Good Household this week: Cheesy Chicken, Rice and Broccoli Casserole. The Good Husband hates rice. The only thing he will eat it in is Porcupine Meatballs. But a lot of casserole recipes call for rice. The trick, I have found to get TGH to eat something he doesn't like, is to cover it with cheese. He loves chicken and he loves broccoli and cheese, so why not add some rice in there as well?
I must admit that while I don't see this staring in a reoccurring weekly role in the Good Household, it is definitely a "make again" dish.
 Ingredients:
3 cups chicken broth
1 1/2 cups of uncooked, long grain white rice
2 cups of cooked chicken breast, cubed
2 cups of broccoli florets, cooked or one package of frozen broccoli
2 tablespoons of butter
2 tablespoons of flour
1/2 cup chicken broth
1 1/2 cup of milk
2 cups of shredded cheddar cheese
Directions:
~Preheat oven to 350 degrees F.
~In a medium saucepan, bring the 3 cups of chicken broth to a boil. Mix in the rice, cover and simmer for 15 minuets.
~In another sauce pan over medium, melt the butter with the flour to form a roux. Slowly add the 1/2 cup chicken broth and the milk, whisking to break up any lumps. Continue to whisk, in a figure eight pattern, until the sauce is thick and bubbly. Add the cheese and whisk to combine.
~Once the rice is cooked, add the chicken and the broccoli and stir to combine. Pour the cheese sauce over the rice, chicken and broccoli mixture and stir to combine. Pour the mixture into a 9x13 baking dish.
~Bake, covered, for 30 to 35 minutes or until heated through. Remove the foil and top with additional cheese and bake for 10 minutes more, if desired.
recipe by: The Good Wife
The next casserole of the week is a star in the Good Household: The Original Tater Top Casserole.
This dish first made it's debut on the blog under the Ingredient of the Week . . . Ground Beef, in the "sloppy" version. But this is the original, and as TGH would argue, best version of the dish.
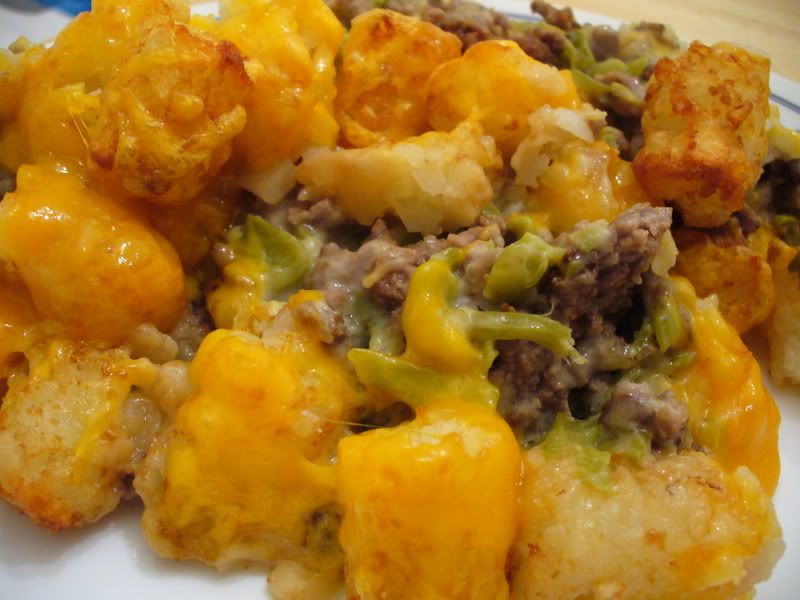 The Original Tater Tot Casserole
Ingredients:
1 lb ground beef
1 lb ground turkey
Salt, pepper and grill seasoning to taste
1 15-ounce can cream of mushroom or cream of celery soup
1 can cut green beans
1 medium bag tater tots
2 cups shredded cheese
Directions:
~Brown meat in a large skillet over medium high heat. Drain off fat and season with salt, pepper and grill seasoning.
~Add the cream of mushroom or celery soup. Drain and add the can of green beans.
~Pour mixture in the bottom of a 13x9 casserole dish. Layer the tater tots on top.
~Bake uncovered for 35 minutes at 425 degrees. Remove from oven, top with the cheese and bake for another 10 minutes.
recipe by: The Good Grandma
Monday, October 20, 2008
Fall Decor
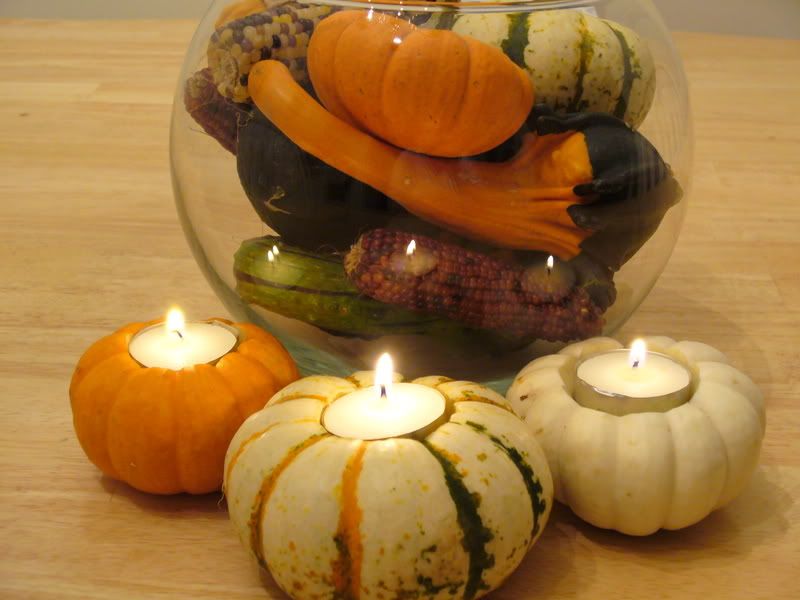
I also made some candle holders from the mini pumpkins I bought.
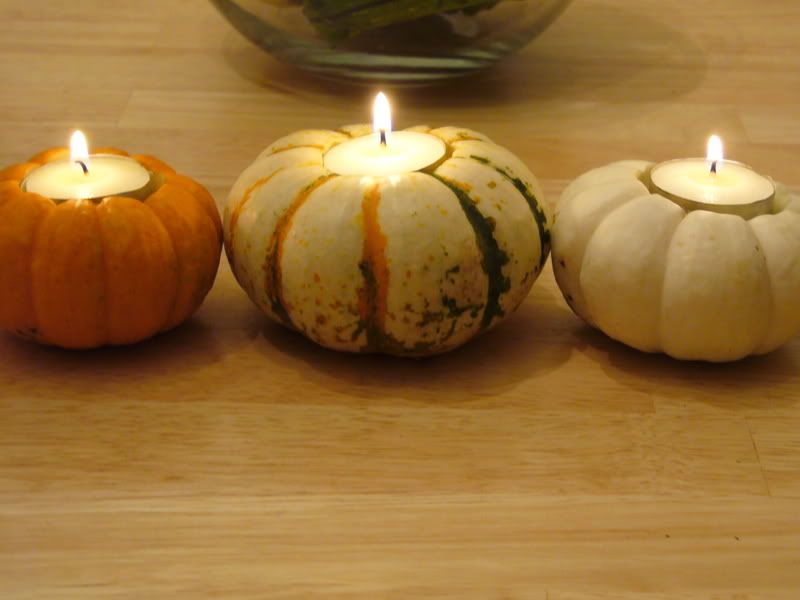 They are pretty simple to make. I placed a tea candle on the top of the pumpkin and traced around the edges. I then used a small kitchen knife to cut out the hole and a small spoon to dig out the seeds. I stuffed the hole with some newspaper (otherwise the candle would fall down too much in the hole and I wanted it as level with the top as possible) and placed the candle on top.
Move over Martha Stewart!
Trip to the Pumpkin Patch
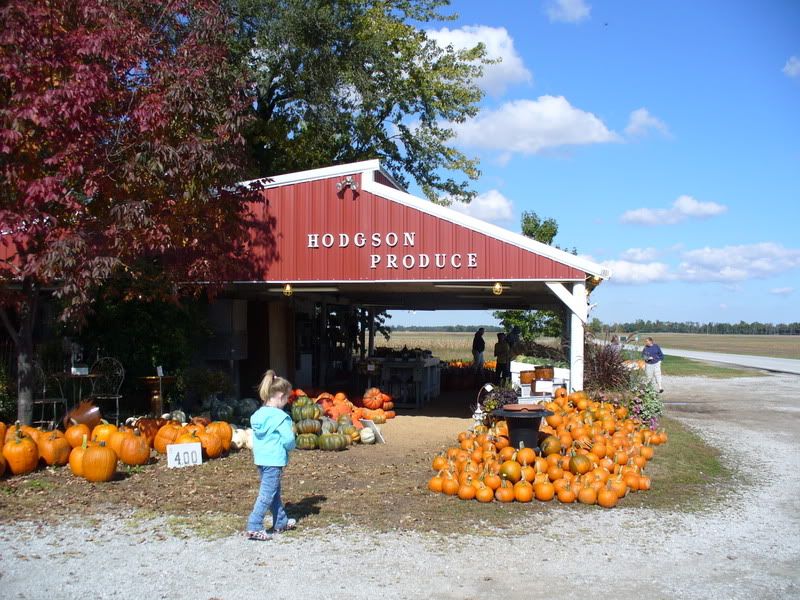 There is so much produce and decorations that I have a hard time not buying the entire place, much to the chagrin of The Good Husband. He doesn't have the decorating sense I have and cannot appreciate just how beautiful everything is.


Halloween Cookies
I love freaking myself out by watching scary movies. I love eating tons of candy and I love making Halloween treats.


Tuesday, October 14, 2008
Trip to the Farmer's Market 4


Arugula for my liberal self, Chives and Sorrel


Apples and House Plants


Friday, October 10, 2008
Ingredient of the Week . . . Bread
I normally do a modified version of this for dinner, dredging the chicken in flour, eggs and milk and then breadcrumbs and Parmesan cheese, fried to a golden brown. But that's it. I stop at the yummy breading and leave the sauce and extra cheese off. But I decided to do the full recipe this week since we haven't had any pasta in a while.
 This dish relies on the bread crumb mixture as much as the Parmesan cheese. To make the homemade bread crumbs, I cubed one loaf of the white sandwich bread I made earlier in the week. I allowed the bread to sit, overnight, on a cookie sheet uncovered. This allowed the bread to get nice and stale. Then I allowed the bread to dry more by toasting it in the oven for 15 minutes on 300 degrees. I then placed the cubes in a plastic bag and whacked at it until it was nice and fine. I then added a handful of parsley, some oregano and basil and voila, I had homemade Italian breadcrumbs.
Ingredients:
2 boneless, skinless chicken breasts
1/2 cup flour
1 egg
2 tablespoons milk
1/2 cup Italian seasoned breadcrumbs
1/2 Parmesan cheese
4 tablespoons canola or extra virgin olive oil
8 oz dried spaghetti
1 jar of your favorite pasta sauce
1/2 cup mozzarella cheese
Directions:
~To bread the chicken, form an assembly line of three large, shallow bowls. In the first bowl add the flour. In the second bowl combine the egg and milk and beat until combined. In the third bowl, add the breadcrumbs and Parmesan cheese and mix until combined.
~Add one chicken breast to the flour, turning to coat and then shaking off any excess flour. Next, dip the flour in the egg wash and allow any extra to fall back into the bowl. Finally add the chicken to the breadcrumbs and turn to coat evenly, pressing the breadcrumbs into the chicken.
~In a large skillet over medium high heat, add the oil and the chicken and allow the chicken to brown, about 4 minutes on each side. When the chicken has browned, removed from the skillet and place on a baking sheet. Transfer the chicken to a preheated 350 degree oven and bake for 20 minutes or until the chicken is cooked through.
~Top the chicken with the mozzarella cheese and bake for 5 minutes more.
~Meanwhile cook the spaghetti according to the directions. Drain and add back into the pot. Add the pasta sauce and toss to combine.
~To serve, plate a large spoonful of spaghetti and then top with the chicken breast. Sprinkle with additional Parmesan cheese.
recipe by: The Good Wife
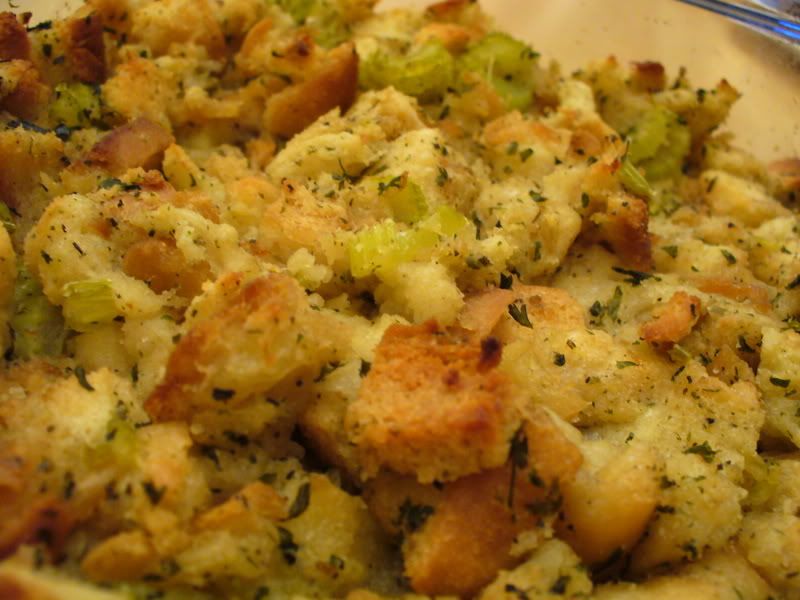
The second dish I made this week is stuffing. Stuffing is one of my all time favorite dishes at Thanksgiving. I like my stuffing baked in the oven so that the top is nice and crunchy. I hate soggy, goopy stuffing. I served this with a nice thick pork chop and peas.
 Ingredients:
1 loaf white bread, cubed, see above
2 tablespoons butter
1 onion, diced
2 celery stalks, diced
2 tablespoons minced fresh parsley leaves
1/2 teaspoon dried sage, rubbed between fingers
1/2 teaspoon dried thyme leaves
1/4 teaspoon salt
1/4 teaspoon ground black pepper
1 cup low-sodium chicken broth
1 large egg
Directions:
~Spread bread cubes in a single layer on a cookie sheet and let dry overnight. Heat oven to 300 degrees. Bake bread until golden, 12 to 15 minutes.
~Saute onion and celery in butter in a large skillet over medium-high heat until soft, 8 to 10 minutes. In a large bowl, mix bread, vegetables and remaining ingredients.
~Add mixture to a greased 3-quart baking dish. Cover with foil and bake 30 minutes at 350 degrees. Remove foil; bake 15 minutes more.
recipe by: The Good Wife
Thursday, October 9, 2008
Poll Results
In the next few weeks, I hope to add some pictures of all my favorite fall decorations with some Halloween ones thrown in as well.
Wednesday, October 8, 2008
White Bread
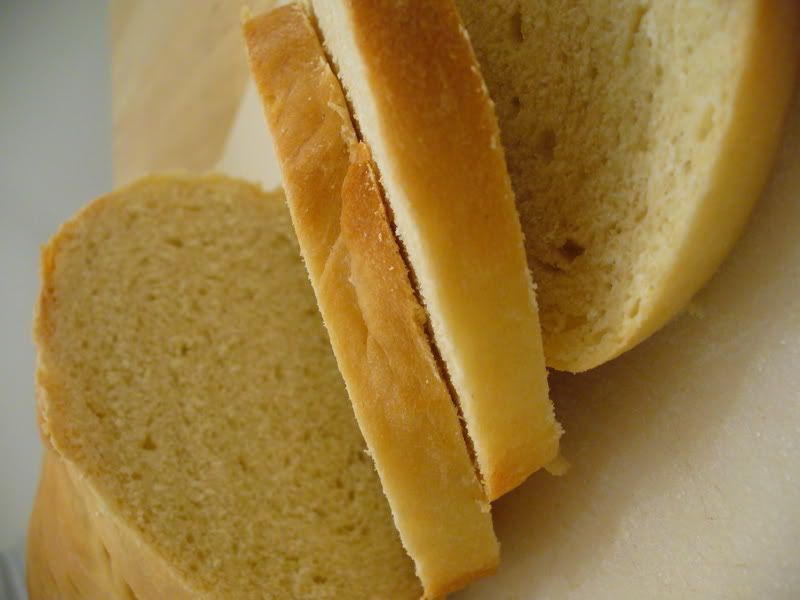
Imagine me drooling like Homer Simpson and that is how I feel about bread. Any bread. I can't even attempt a low carb diet because of my bordering on unnatural love of bread. Once, a long time ago, I even worked at Panera Bread, a job I loathed, just for the free loaf of bread I got every month.
 Bread is something new to me in the baking department. I really haven't tried it before and you can tell. My first attempt with a yeast bread was this French Bread recipe. This was my first go at white bread, or sandwich bread. It was also my first recipe out of Joy of Cooking, the cookbook I got for my birthday.
I used bread flour instead of all purpose flour and I think the texture was affected. The bread was slightly chewy. It wasn't fluffy like Wonder Bread and I didn't do a very good job rolling the loaf and sealing the seams.
But it did have a nice, slightly sweet flavor and it wasn't rock hard. Overall I think I did a B+ job but I will work on perfecting this.
 Ingredients:
1 cup milk
1 cup water
2 tablespoons sugar
1 tablespoon vegetable shortening
1 tablespoon butter
1 tablespoon salt
1/4 cup warm (105° to 115°F) water
1 package (2 1/4 teaspoons) active dry
6 to 6 1/2 cups all-purpose or bread flour
Directions:
~Combine in a small saucepan and heat until warm (105° to 115°F)the milk, water, sugar, shortening, butter and salt.
~Combine the water and yeast in a small bowl and let stand until the yeast is dissolved, about 5 minutes.
~Add the lukewarm milk mixture to the dissolved yeast. Stir in 3 cups of the flour and beat 1 minute, then stir or work in 3 more cups flour.
~Toss the dough onto a floured board and knead until it is smooth, elastic, and full of bubbles, gradually adding more flour until the dough no longer sticks to your hands.
~Place the dough in a greased bowl, turn the dough over once, and cover with a cloth. Let rise in a warm place (75° to 85°F) until doubled in bulk, at least 1 hour (I filled a large pan with hot water, placed it in the oven and then placed the bread in to allow it to raise).Punch down the dough and, if time permits, allow it to rise until doubled once more, then punch it down again (For this second rise, I allowed the bread to rise for one hour).
~Divide the dough in half, shape into 2 loaves, and place in greased 9 x 5-inch loaf pans. Brush with oil, then cover with a clean cloth and let rise again until almost doubled in bulk (Again, about one hour).
~Preheat the oven to 450°F. Bake the bread 10 minutes. Reduce the heat to 350°F and bake about 30 minutes longer. Bake until the crust is golden brown and the bottom sounds hollow when tapped, 595. Remove the loaves at once from the pans and cool completely on a rack.
NOTE: I used two glass loaf pans, so I reduced the heat to 325. I also only baked the bread at 450 for 5 minutes since I like a lighter brown crust.
recipe by: The Joy of Cooking
Tuesday, October 7, 2008
French Fried Onions
I was amazed at how fast and easy these were to make and they provided for a great topping for homemade burgers. I foresee great use of this recipe now that Thanksgiving is coming up and I always get stuck making green bean casserole.
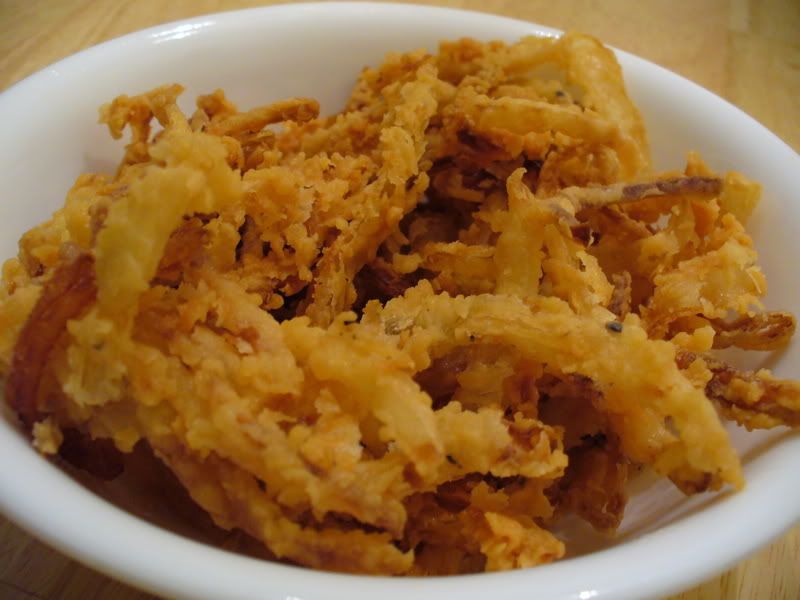 Ingredients:
1 large onion, I used one medium white onion
2 cups buttermilk, I used two tablespoons of lemon juice plus enough milk to make 2 cups
2 cups flour
1 scant tablespoon salt
Lots of black pepper
1/4 to 1/2 teaspoon Cayenne Pepper, I omitted
Canola Oil
Directions:
~Slice onion very thin. Place in a baking dish and cover with buttermilk for at least one hour.
~Combine dry ingredients and set aside. Heat oil to 375 degrees.
~Grab a handful of onions, throw into the flour mixture, tab to shake off excess, and PLUNGE into hot oil. Fry for a few minutes and remove as soon as golden brown.
recipe by: The Pioneer Woman